Configuration
System Configuration
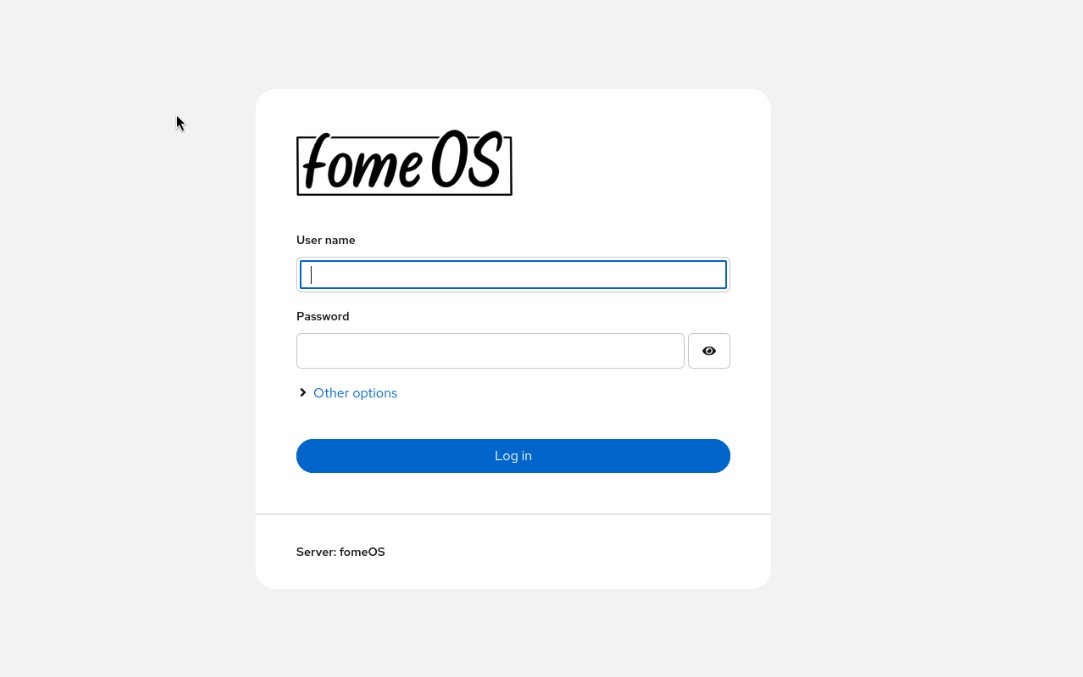
Accessing the Control Panel
http://<kiosk's IP>:9090.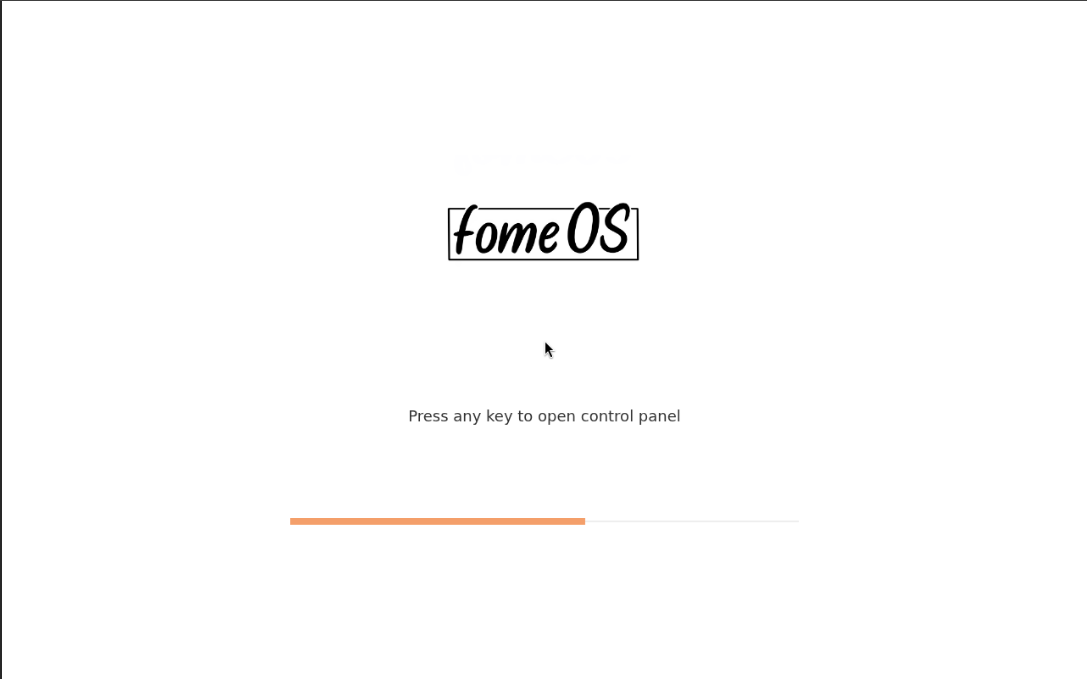
Login with the default credentials
Changing the default password
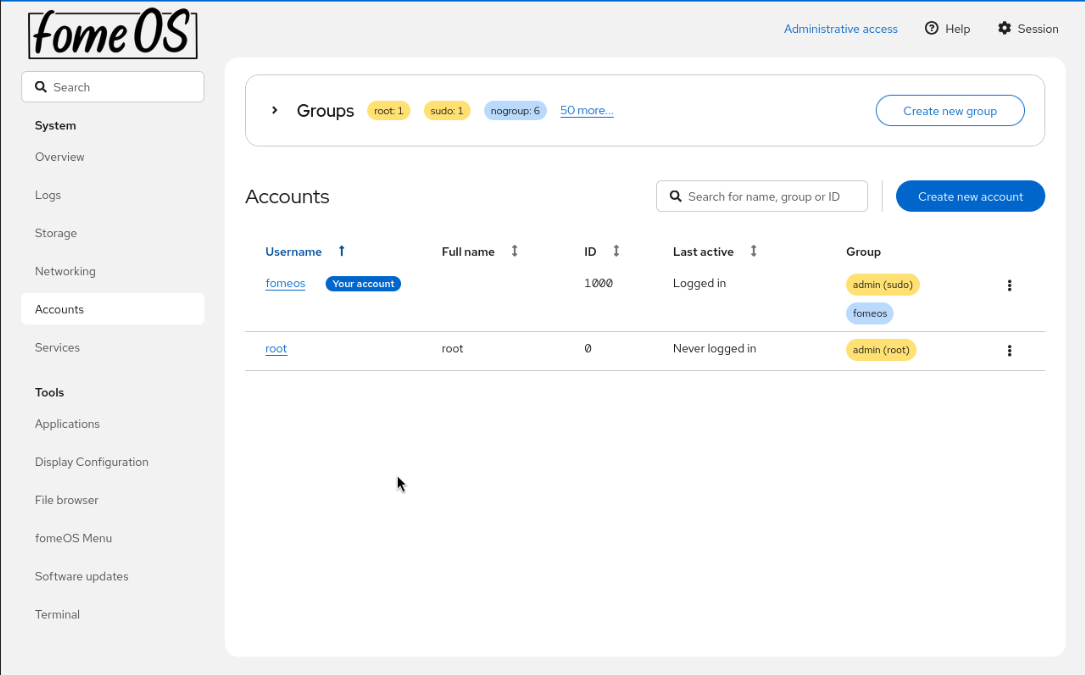
Navigate to Accounts in the left sidebar
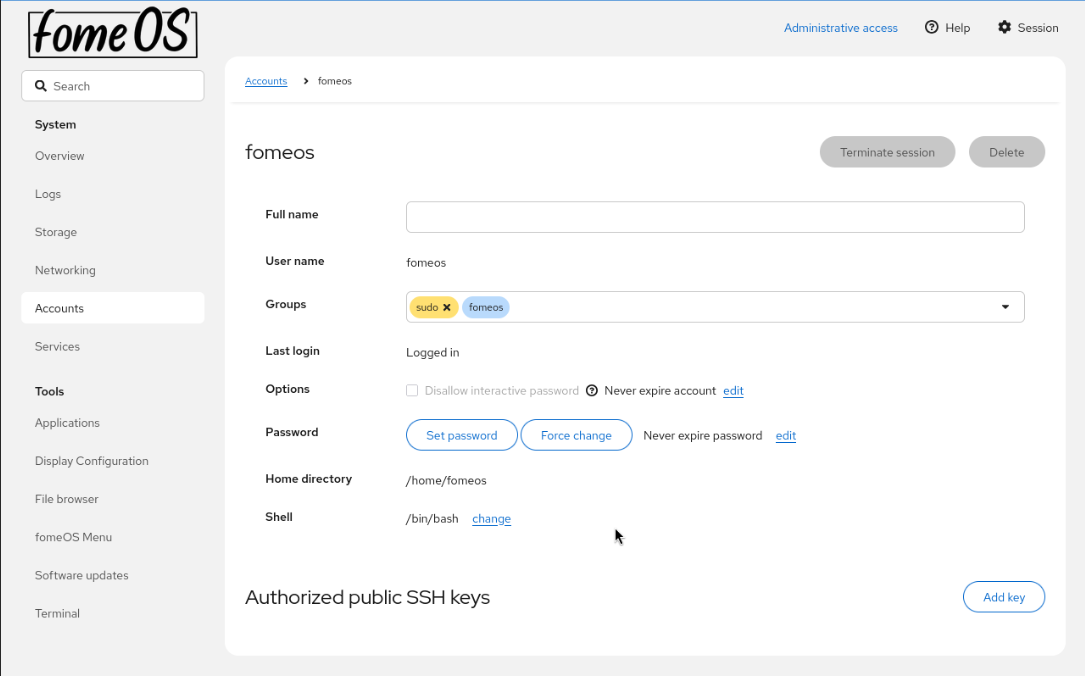
Click the fomeos user
Click on Set password to change the default password.
Click on Set password to save the new password.
Network Configuration
To configure an Ethernet interface:
1. Navigate to Networking in the left sidebar
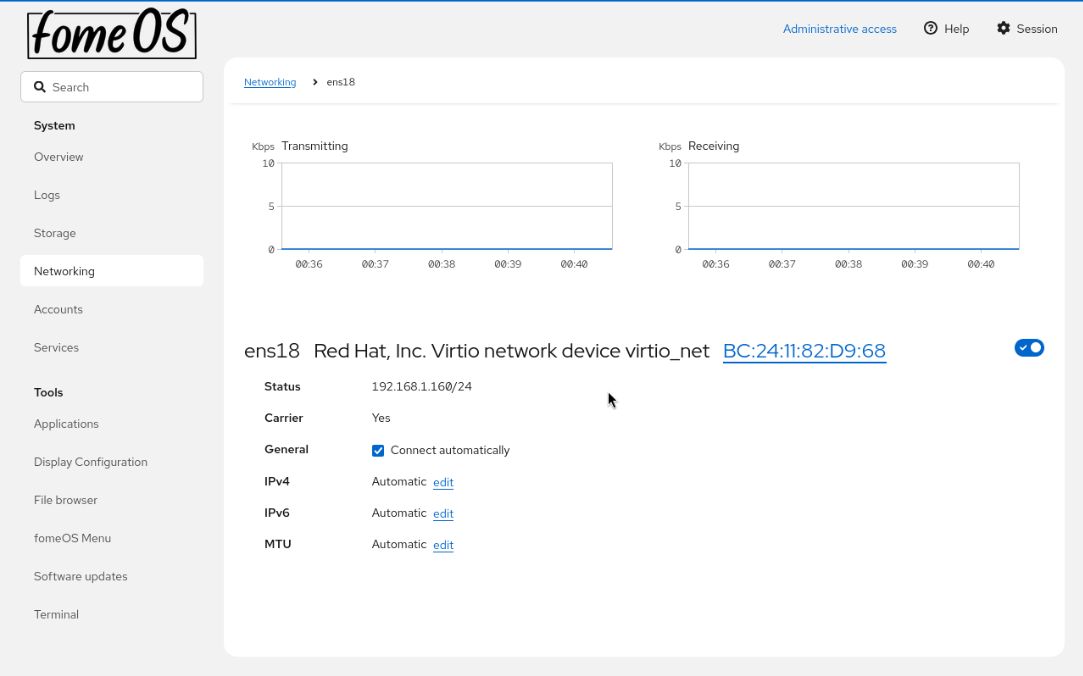
1. Click on the interface name (e.g., ens18)
2. The interface details page shows:
Status: Current connection status
IP Address: IPv4 address
Carrier: Whether the interface is connected
General settings: Connection auto-connect option
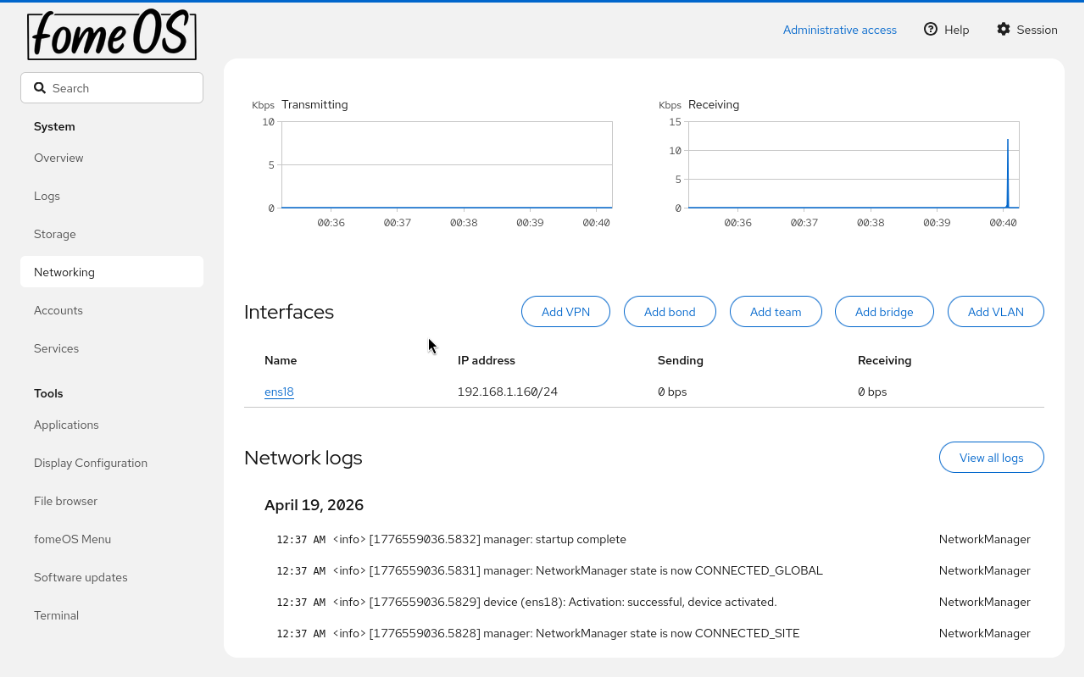
View network interface status and configuration
Click Edit next to IPv4
4. Choose Manual to set a static IP or Automatic for DHCP 4.1 - If using manual:
Enter Address: Static IP (e.g., 192.168.1.100/24)
Enter Gateway: Default gateway IP
Configure DNS: Add DNS servers
Set Search domains: For DNS resolution
Click Save to apply changes
WiFi Configuration
TBC
In order to configurate more advanced network settings like VPNs, bonding, VLAN, etc, please reach the Cockpit official documentation.
Display Rotation
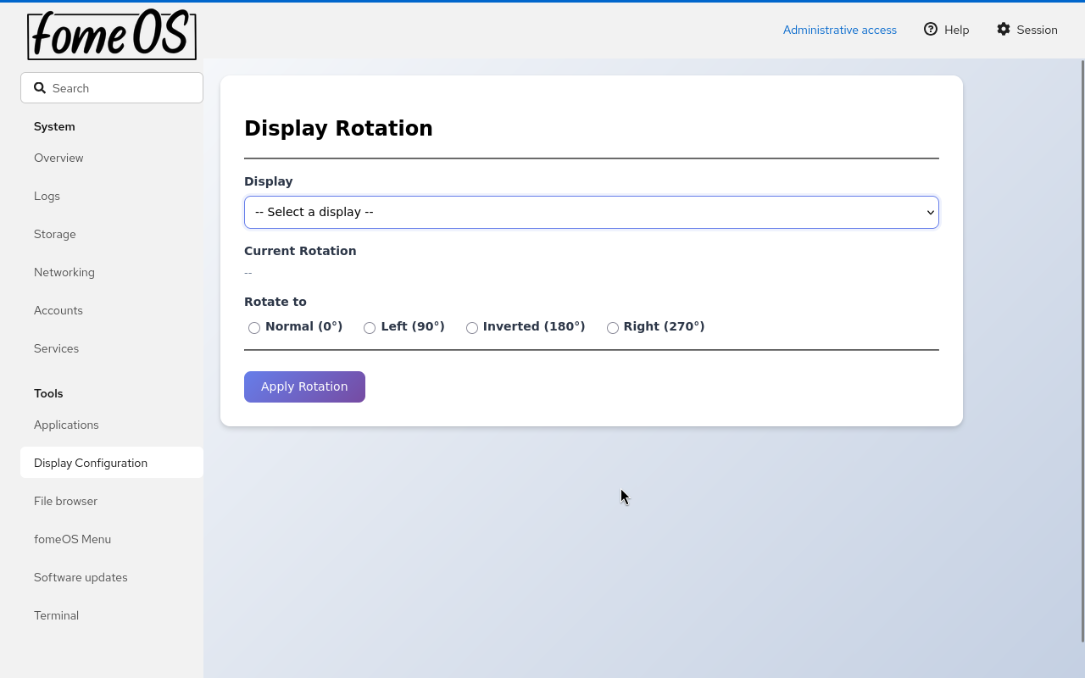
Rotate your display for portrait or landscape orientation:
Go to Display Configuration in the Tools menu
Select your display from the dropdown
Choose rotation angle:
Normal (0°): Standard landscape
Left (90°): Rotated 90° counter-clockwise (portrait)
Inverted (180°): Upside down
Right (270°): Rotated 90° clockwise
Click Apply Rotation to save
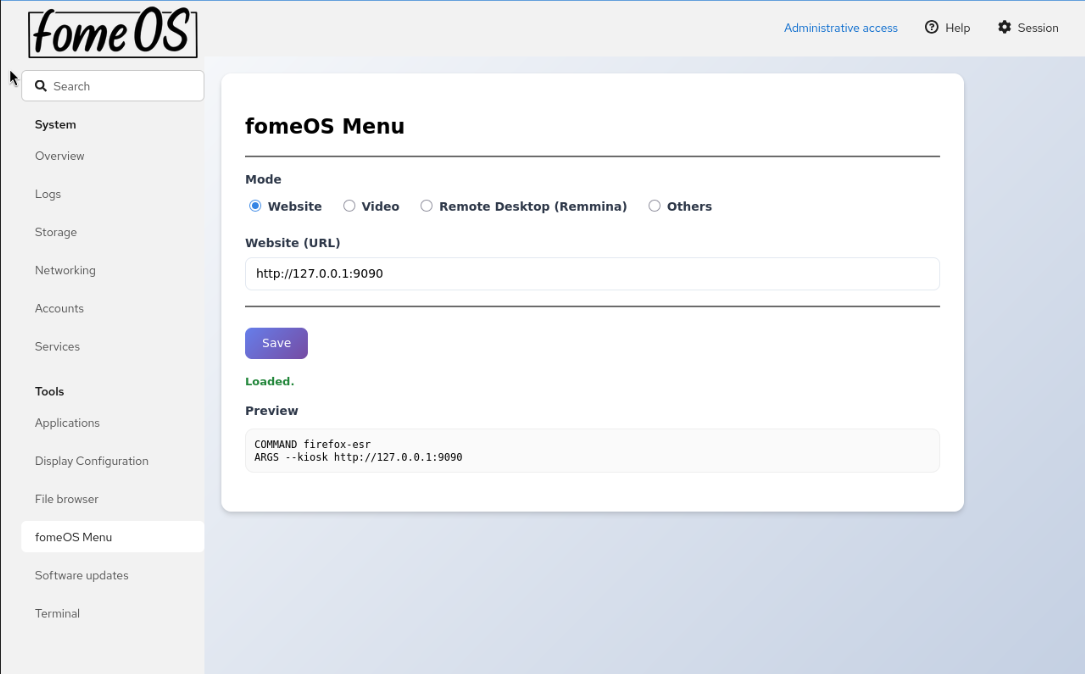
Kiosk Mode Configuration
By default, fomeOS comes with three kiosk modes: Website, Video, and Remote Desktop. You can switch between these modes from the control panel. Also, you can add your own custom mode by selecting Others and entering the command to run at startup.
Website Mode (Kiosk Browser)
Display a website in full-screen kiosk mode:
In fomeOS Menu, select the Website mode
Enter the Website (URL) field with:
Example:
http://fomeos.comOr any external URL
Click Save to apply
The system will launch Firefox in kiosk mode displaying the website
Video Mode (Media Player)
Play videos in a loop:
/home/fomeos/Videos/ directory. You can do this by connecting a USB drive with the videos or by using a file transfer method like SCP or SFTP.Click Storage
Select the partition of the USB drive (e.g.,
sdb1)Click Mount and enter the path /media on Mount Point
Mount clicking on Mount
Go to File browser and navigate to the mounted USB drive (e.g.,
/media/)Copy the video files to the Videos folder in the home directory (e.g.,
/home/fomeos/Videos/)
To configure video playback:
1. Select the Video mode in fomeOS Menu
2. Enter Video name: The video filename (e.g., video.mp4)
3. Path: Videos are stored in /home/fomeos/Videos/
4. Click Save
5. The system will play the video with loop and fullscreen options
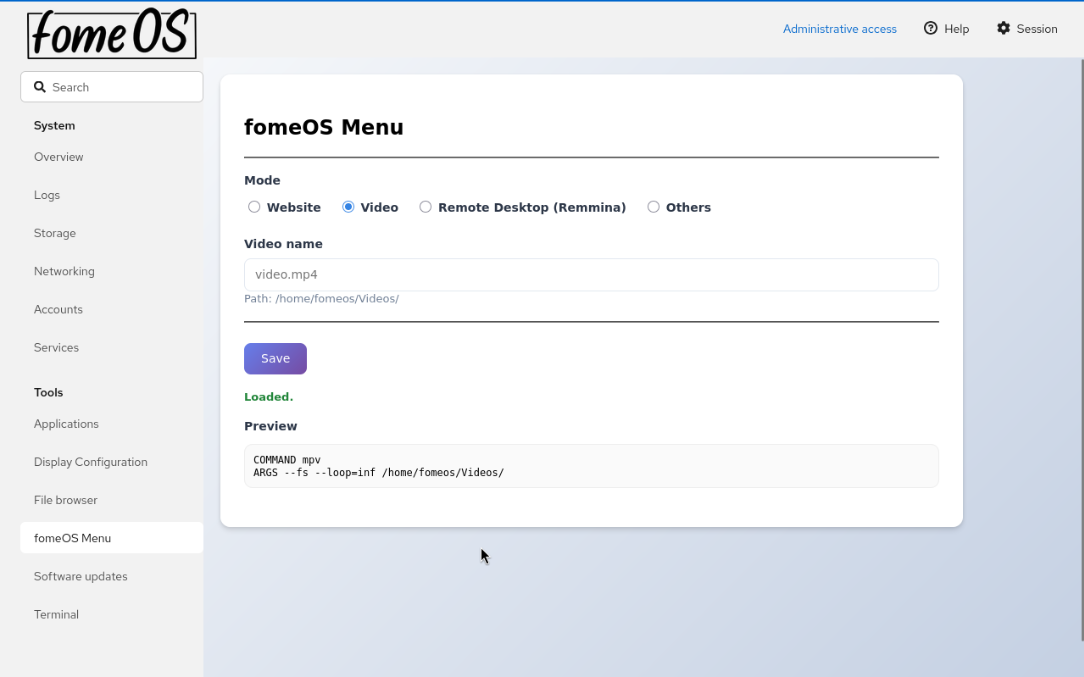
Configure video file for continuous playback
Remote Desktop Mode (Remmina)
Connect to a remote desktop:
Select Remote Desktop (Remmina) mode
Enter connection details:
Server: Remote server address (e.g.,
server.example.com:3389)Username: Remote user account
Password: Remote user password
Click Save
The system will open Remmina and connect to the remote desktop
Note: RDP server certificate will be requested on first connection
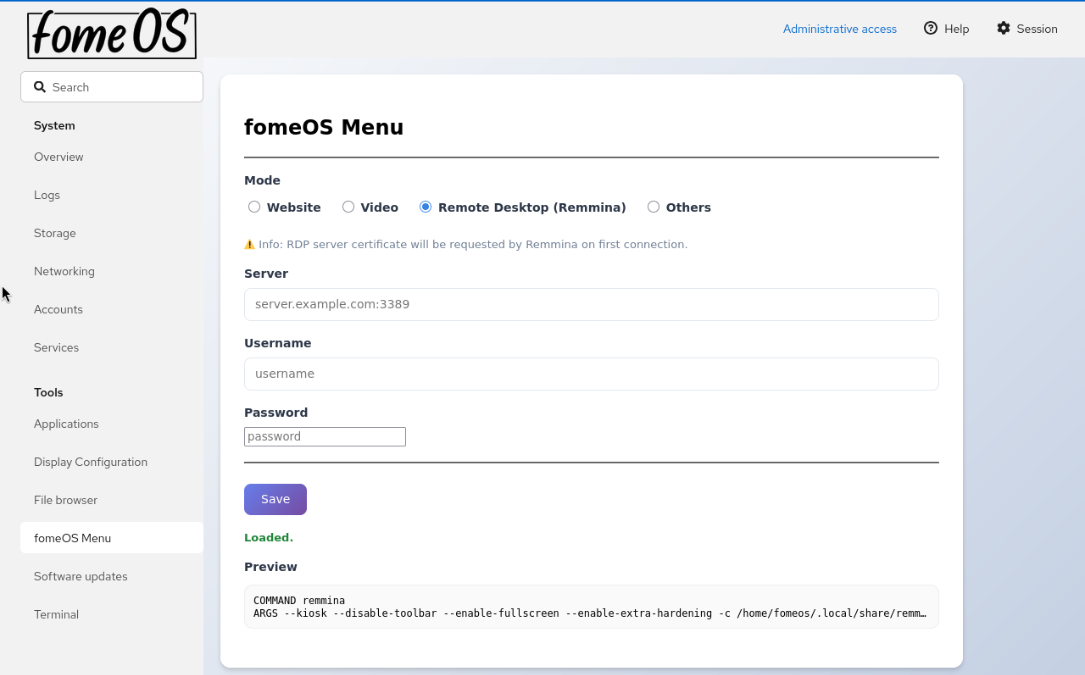
Configure RDP connection settings for remote desktop access
Others Mode
Run custom commands:
Select Others mode
Enter Command: The executable to run
Enter Args: Command-line arguments (flags and values)
The preview shows the exact command that will be executed
Click Save to apply
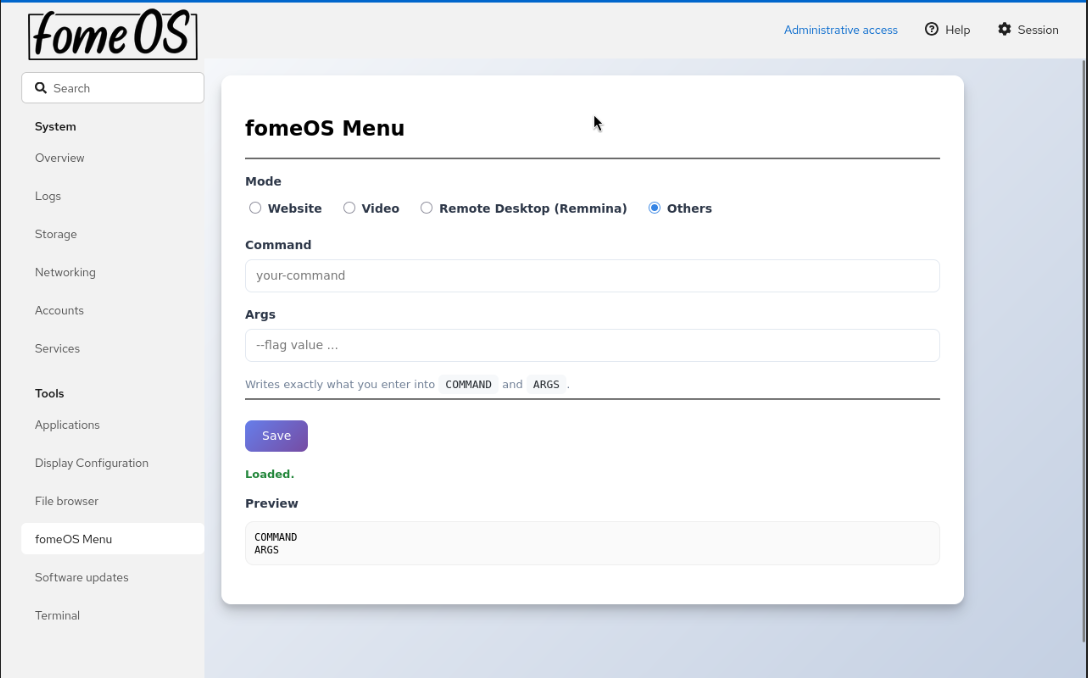
Configure custom commands to run at system startup